- Author
- Wright, Ken
- Subjects
- WWII operations, History - WW2
- Tags
-
- RAN Ships
- None noted.
- Publication
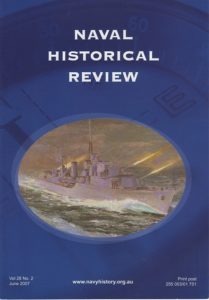
- December 2009 edition of the Naval Historical Review (all rights reserved)
At 2200, a RAAF PBY Catalina from 11 Squadron, using radar, found the enemy ships and remained nearby until approximately 0240 on March 3. A flight of seven RAAF Beaufort torpedo bombers from 100 Squadron left their base at Milne Bay but due to rainstorms only two arrived at the convoy’s location. The Beauforts attacked the convoy at approximately 0615 using flares to illuminate their targets. One aircraft released two torpedoes and both ran on target but failed to explode, possibly because the American torpedoes they were using were plagued with problems and may have been defective. Torpedoes released by the other Beauforts failed to explode so they both did a few strafing passes and returned to base.
‘Fire breathing dragons’
Once it was firmly established that the convoy was heading for Lae, the Allies could now unleash the full force of their airpower. A prelude to the attack on the convoy started with RAAF Bostons from 22 Squadron bombing the Japanese airfield at Lae to disrupt any fighter protection of the convoy, then at 0930 the ‘fire breathing dragons’ of Kenney’s entire strike force of 90 aircraft assembled at the rendezvous point over Cape Ward Hunt to co-ordinate the attack. This was the moment the Allied Air Force had trained so hard for, had waited so long for. It was also the last chance to inflict a mortal blow on the enemy as the convoy’s speed and course would have them safely in Lae harbour by mid morning or early afternoon, protected by fighters from nearby bases and unloading. The dogs of war were off the leash, thirsting for Japanese blood or perhaps it would be more appropriate to say that the ‘Birds of Prey’ were circling their intended victims.
The Japanese could see the approaching armada of enemy aircraft spreading out to slot into their assigned positions. With all these aircraft massed together, it was an impressive sight. The Imperial Japanese Navy anti aircraft gunners were experienced and confident. Even at a range of six miles, shells were bursting 100 yards in front of the approaching Beaufighters. Japanese fighters in the vicinity headed for the massed Allied formation while the P-38s dropped their long range fuel tanks and went to intercept them. It was 1000 and the game was on. The Allied operational plan called for the attack to be carried out in three waves at three levels only seconds apart, the B-17s to go in first and bomb the convoy followed by the RAAF Beaufighters. Somewhere something went wrong. Only seconds ahead of the B‑17s, twelve Beaufighters from No. 30 Squadron went in first, heading straight for the destroyers in line abreast formation and flying low. Heavy losses were expected. Fortunately, mistaking the Beaufighters for torpedo bombers, the destroyers turned towards the incoming aircraft making them a smaller target but leaving the transports exposed. Ignoring the destroyers, the Beaus went straight past and attacked the transports with 20 mm cannon, rockets and machinegun fire, strafing decks, gun crews, ships’ bridges and cargo.
For the Japanese, it was a nightmare of epic proportions. Blood washed across the decks and turned the green waters of the Bismarck Sea red. The Squadron’s job was to neutralise the anti-aircraft guns and buy precious seconds for the following B-25s. It wasn’t part of the plan but some B-25s were already in with the Beaus adding a deadly hail of lead to the slaughter below from their .50 calibre machine guns mounted on specially modified gun platforms. The ammunition was belted in the following sequence: one tracer, two armour piecing and then two incendiary rounds. When the B-25s fired, it appeared to the Japanese as if the aircraft was on fire. Then came the deadly rain of bombs when USAAF B-17s began bombing the convoy from about 7000ft. With the ships scattered and no longer able to give each other covering fire, the third wave, consisting of American B-25 Mitchells, used the newly developed ‘skip’ bombing technique to inflict more heavy damage.
As the bombs crashed with deadly accuracy into one ship after another, the escorting Japanese fighters were unable to stem the carnage below as American fighters fought furiously to keep them away from the bombers. One B-17 was shot down but the crew bailed out only to be machine gunned in their parachutes by Japanese fighters. Any survivors of this callous attack would have been shown no mercy as the parachutes unfortunately landed in the middle of the convoy. Three P-38s made a gallant attempt to stop the Japanese aircraft from attacking the helpless B-17 crew but they themselves were shot down.
