
- Author
- Hampshire, A. Cecil
- Subjects
- Ship histories and stories, WWII operations
- Tags
-
- RAN Ships
- None noted.
- Publication
- December 2001 edition of the Naval Historical Review (all rights reserved)
But there were a host of other troubles clamouring to be dealt with afloat. In the immediate vicinity of 16th A/S Group’s senior officer, Lt Cdr Sir Geoffrey Congreve RN in the trawler Aston Villa, the transport Saumur was badly aground and, to make things worse, she had managed to get a wire firmly wrapped round her propeller. She would be a sitting duck for the next attack, and the transports were valuable. Congreve ordered the Angle and Arab to go to her aid.
As senior ship with a RN Lt Cdr in command, the Angle went in first to tackle the job. She soon had the situation well in hand, so Stannard went off to see if he could be of help elsewhere.
There was one place where assistance was urgently needed, the worst in the whole crowded fjord, the fire on the pier which was now raging furiously. If it were not checked many hundreds of tons of vitally needed stores would be destroyed, while the grenades and other ammunition nearby might go up in a colossal explosion. Stannard ordered hoses to be rigged on the forecastle, and steamed at full speed towards the pier. As the trawler nosed in the heat of the flames caused the paint on her sides to blister and curl.
When the trawler’s stem finally bumped against the pier uprights, Stannard ordered her to be kept in that position with the engines going slow ahead. Then he turned the bridge over to his first lieutenant and shined down to the foredeck. Accompanied by two of the crew and ordering the rest of the men to remain aft, he climbed onto the forecastle and began directing water into the blaze.
For two hours he stood facing the searing heat as the trawler’s pumps sucked up the icy water of the fjord and sent it spurting through his copper branch pipe. Frequently Stannard and his men had to duck to avoid flying fragments of bursting grenades. Occasionally his helpers soused him to prevent his clothes from charring. Soon, however, their hair and eyebrows became singed, their faces blackened, their throats parched and dry and their lungs full of choking smoke. And their efforts were having about as much effect as a cup of tea poured into the erupting crater of a volcano. Just as Stannard realised their hopelessness of the situation another air-raid developed.
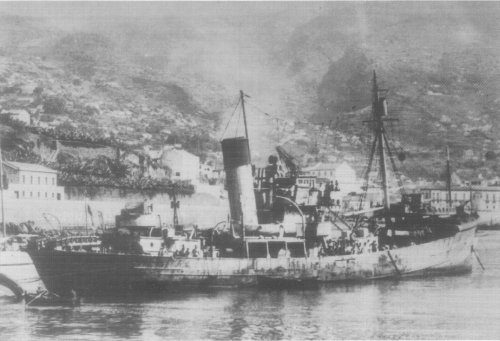
Circling above the smoking fjord to select their victims before screaming down to the attack once more, the Nazi airmen noticed the British trawler lying pressed against the blazing pier and quickly divined her purpose. No fewer than 16 Stukas pointed their spinners at the valiant little Arab. But Stannard and his first lieutenant, the young Australian, Lees, were ready for them.
The trawler shot astern from the pier, crew back at their guns, and made for an overhanging cliff, spouting streams of tracer as the Ju 87s slammed their bombs at her, from every point of the compass. But they failed to hit her. With her hull plates starting from the concussion of near misses, the Arab slid to safety beneath her rocky shelter. Frustrated, the Stukas zoomed away in search of an easier target.
The next day, Monday, was no different from Sunday. Warships and merchantmen jostled each other in Namsen Fjord and heavy scale air attacks continued throughout daylight hours. Ashore things were going badly for the Army and there was talk of evacuation.
With the coming of dawn on Tuesday, the 30th April, the Luftwaffe were back in force. The familiar pattern of the bursting bombs and diving Stukas began to be repeated almost before the heavy-eyed trawlermen in the Arab could drink the mugs of hot tea and munch the corned-beef sandwiches brought to them at the guns by the cook. Soon the sloop HMS Bittern was in trouble as the Ju 87s marked her down for their special target.
The valiant little Arab promptly sailed in to add her small quota of gunfire to the heavier armament of the 1,190 ton sloop. In the narrow crowded anchorage the Bittern was unable to dodge and manoeuvre under the persistent attack of her enemies. For a while, aided by the trawler’s guns, she was able to fight them off. But later the planes returned, and this time the luckless sloop was left a mass of flames. The men of the Arab took off her smoke-blackened survivors, and the blazing warship was sunk by her sister ships.