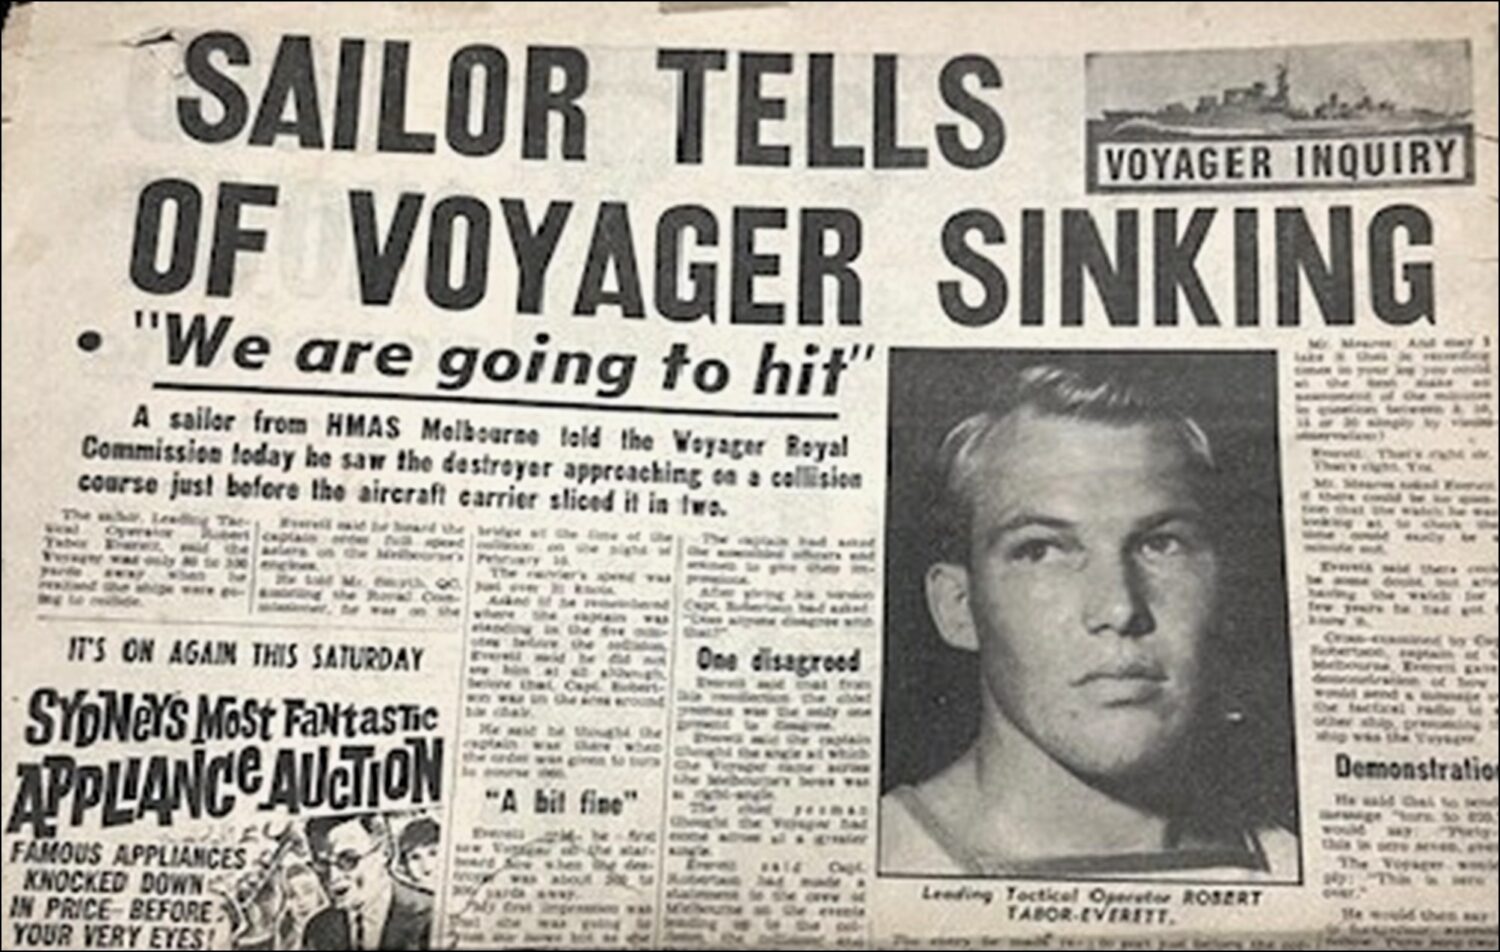
By Rob Everett
One piece of critical evidence to the Royal Commission into the tragic collision between HMAS Voyager and HMAS Melbourne off Jervis Bay during the first watch of 10th February 1964, over sixty years ago, was the Bridge Communication Operator’s Log. Leading Tactical Operator Robert Everett (at that time) presented the details of that log to the Royal Commission, and many years later set about finding it.
This is his story.
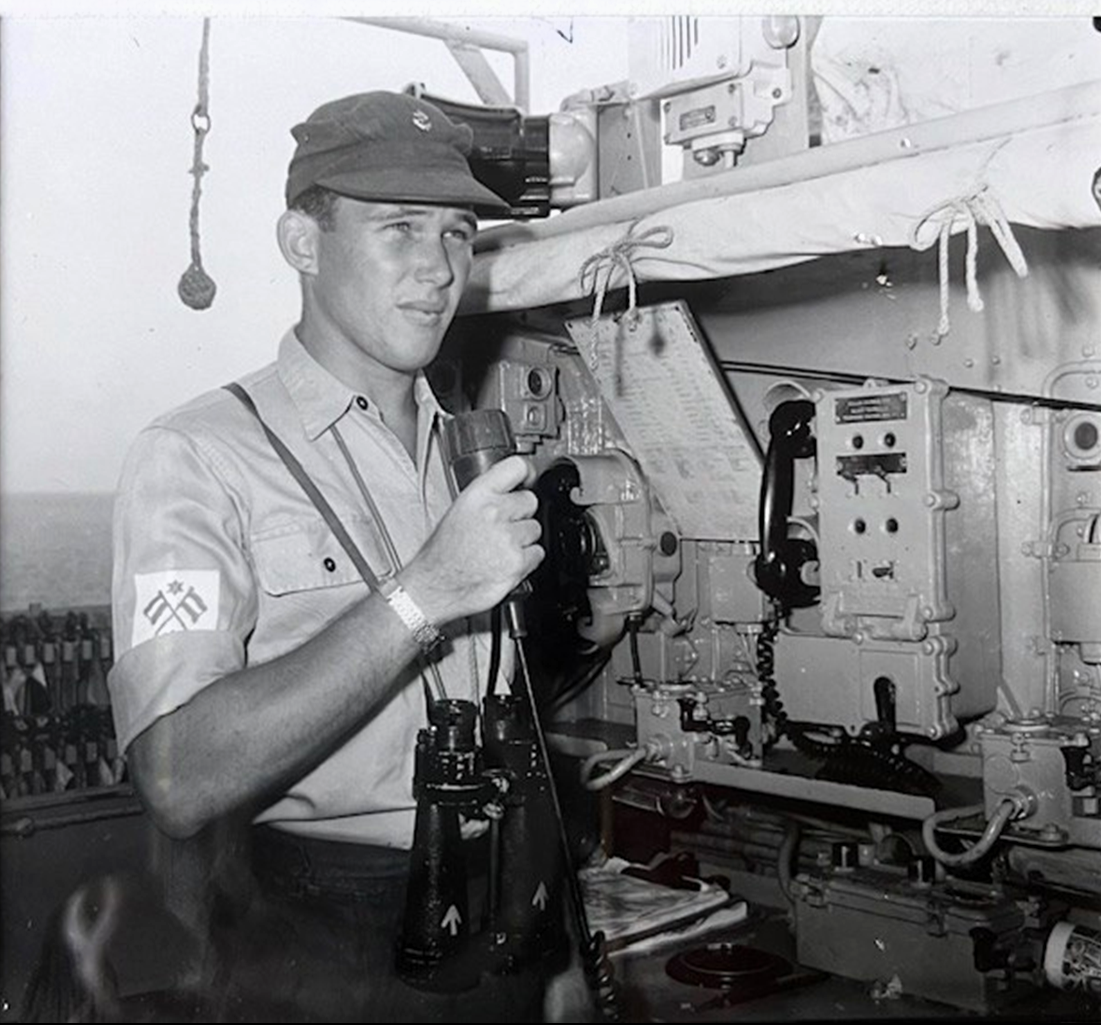
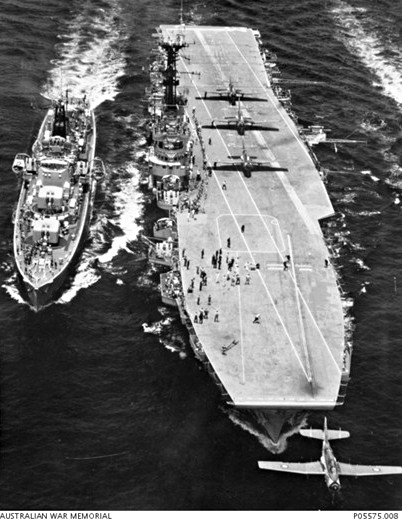
I was a Leading Tactical Operator in HMAS Melbourne, and at 7:50pm on the 10th of February 1964, I took over the bridge communication watch on Melbourne’s Compass Platform. I was manning the Tactical Primary (TACPRI) radio circuit being used for all maneuvering signals between the ships on the night. We were in company with HMAS Voyager who was acting as Rescue Destroyer (RESDES) for flying operations.
I was not thinking much beyond the night flying exercises which were to be conducted that evening with Sea Venom and Gannet aircraft from HMAS Albatross carrying out “touch and goes”. Little did I, or anybody else for that matter, realise that within two hours the forward half of Voyager would have sunk and 82 men were dead or dying. Melbourne would be down two and a half feet by the bow and that the after half of Voyager would also sink shortly after midnight. Australia’s worst peacetime disaster was about to take place.
I, among many others, attended the first Royal Commission and was interrogated by various QCs about the signals I had sent, the correctness of recording of those signals in the communications log, radio conditions on the evening, and many other communication associated matters.
The signals sent on this evening were considered by many to be one of the main reasons why the collision took place. Fortunately my opposite number manning TACPRI on Voyager’s bridge survived the collision and although badly injured, confirmed, following his interrogation by various QCs, those maneuvering signals sent from Melbourne were received and interpreted correctly on Voyager’s bridge. This was despite him not having access to Voyager’s bridge communications log, which unfortunately went down with the ship.
Melbourne’s bridge communication log is therefore the original and only hard copy of maneuvering signals used leading up to the collision. Over the years I have made many attempts to locate this bridge communication log from HMAS Melbourne, as I think it a worthy and important document for any future study that may take place into the accident, if any.
Having unsuccessfully tried both Naval and Legal sources to trace the log I was advised by a legal friend to contact the Minister for Defence The Hon Richard Marles MP, and the Attorney-General The Hon Mark Dreyfus KC MP, for assistance.
A naval friend recommended that if I contacted the Ministers, to also contact my Local Member M/s Kylea Tink, which proved to be good and useful advice. I contacted both Ministers and my Local Member with sufficient details to identify the log, its historical significance (in my opinion) and that the last time I saw it was at the first Royal Commission. I was not sure if it had been used at the second Royal Commission and that may be the reason it was difficult to locate. All three acknowledged my request.
Some weeks later I received an email from my Local Member M/s Kylea Tink advising that she had received a response to my request from the Minister for Veteran Affairs and Defence Personnel, The Hon Matt Keogh MP. The information from him was relating to signal traffic from and to HMAS Melbourne on 10/11 February and which was held in the National Archives. He also advised that the Deputy Chief of the Navy (DCN) would be writing to me with further information.
In due course DCN’s letter arrived with further detailed locating advice. I now had a starting point for my search. Following up this advice required both written and oral communication with Research Officers of the National Archives of Australia and I was most impressed with the assistance I was given. I was in contact with officers in Sydney, Melbourne, Canberra and Adelaide. It appeared to me that requests for assistance are allocated online amongst the Research Officers and whoever is available next amongst those officers takes the call regardless of state borders. Without exception they were helpful and willing to assist and a pleasure to deal with.
Upon contacting Archives with my locating information, I was sent a link which took me to a ‘series page’ of an online catalogue in which there were 85 items for me to search through. Their advice was “that I may be able to identify items that may contain the logbook you are seeking”.
Each item was vast, with most seeming to contain transcripts of Royal Commission documents, so I decided to search for the smallest item and one that mentioned signals. I thought I had hit the jackpot when I came across “Log of signals originated by and received by HMAS Melbourne between 10 February 1964 and 11 February 1964 Folioed 1 to 159 (Part Box 5) Transcripts of Royal Commission”.
I immediately contacted Archives asking that this log of signals be sent to me, which they agreed, and said that there would be a fee as these items had not been photocopied to date. That seemed reasonable so I paid the fee and eagerly waited to see a picture of “my” logbook.
When the item eventually arrived, I was surprised to see that it was a group of 75 signals, all for 10/11 February 1964, which Melbourne had originated or been in the address.
Unfortunately, not one of the signals was in respect of the maneuvering signals used on the night but what a treasure trove of signals and what memories they brought back. The signal contents ranged from initial advice of the collision to Navy Office, follow-up messages leading to Voyager’s sinking, rescue details, ships/ aircraft involved, many lists of survivors and medical movements where some survivors needed hospital treatment, FOCAF’s movements and many other matters relating to the collision.
The following are signals from the group of 75 relating to Melbourne and Voyager and give a time scale from the moment of collision until Voyager sank, which I think may be of interest.
20:54pm was the time of the last maneuvering signal from Melbourne to Voyager. That signal ordered her to her Plane Guard station and advised the Flying Course 020 and Speed 22 knots.
20:56pm. Time of collision 10 February 1964.
21:00pm. Signal from Melbourne. 4 minutes after collision—HAVE BEEN IN COLLISION WITH VOYAGER IN POSITION 120 POINT PERPENDICULAR 19.
21:14pm. Signal from Melbourne. 18 minutes after collision—VOYAGER HAS LOST HER BOWS BUT IS STILL FLOATING. AM RESCUING SURVIVORS. SEA CALM.
21:42pm. Signal from Melbourne 48 minutes after collision—VOYAGER HAS SETTLED BY THE BOWS WATERLINE AT FORWARD END OF TORPEDO TUBES. SHE STILL HAS LIGHTS ONBOARD. FURTHER INFORMATION WILL BE SIGNALLED WHEN AVAILABLE
.22:16m. Signal from Melbourne 1 hour 20 mins after collision—DAMAGE TO MELBOURNE. NUMBER ONE AND TWO TRIMMING TANKS FLOODED TO FIVE DECK. FOUR ALFA SHIPS COMPANY HEADS DAMAGED AND HOLED FORWARD PORT AND STBD. CABLE LOCKER MAY BE HOLED. SHIP WATERTIGHT AFT OF 16 BULKHEAD. NO PERSONAL CASUALTIES.
23:59pm. Signal from Melbourne 2 hours 56 minutes after collision—VOYAGER IS FLOATING STERN IN THE AIR WATER AT AFTER END OF TORPEDO TUBES. FORWARD BULKHEAD OF BRAVO BOILER ROOM HAS HELD. BRAVO BOILER ROOM HAS SOME WATER IN IT AND IS PROBABLY FLOODING FURTHER FORWARD PORTION OF SHIP HAS PROBABLY SUNK.
23:56pm. Signal from Melbourne. 3 hours after collision—BRIEF OUTLINE OF EVENTS LEADING TO COLLISION. MELBOURNE HAD BEEN FLYING COURSE 190 SPEED 22 VOYAGER IN PLANE GUARD STATION ONE. FLYING SUSPENDED DUE TO LACK OF WIND AND SHIPS TURNED TOGETHER TO STARBOARD TO 020 TO SEARCH FOR WIND FURTHER TURN MADE TOGETHER TO 060 THEN BACK TO 020. AT THIS TIME VOYAGER WAS BEARING 040 DEGREES 1500 YARDS FLYING COURSE WAS THEN ALTERED BY SIGNAL TO 020. VOYAGER TURNED ABOUT 30 DEGREES TO STARBOARD AND APPEARED TO SLOW DOWN THEN TO PORT ACROSS MELBOURNE’S BOWS. AT TIME OF COLLISION SHE WAS APPROXIMATELY RIGHT ANGLES TO MELBOURNE WHO HIT HER ABREAST THE AFT END OF THE BRIDGE. VOYAGER DID NOT APPEAR TO BE DOING MORE THAN ABOUT 15 KNOTS. MELBOURNE HAD ORDERED FULL ASTERN. VOYAGER THEN PASSED STERN FIRST SLOWLY DOWN STBD SIDE OF MELBOURNE AND CAME TO REST JUST ABAFT THE STERN.
00:18am. Signal from Melbourne 3 hours 22 mins after collision—VOYAGER HAS SUNK.
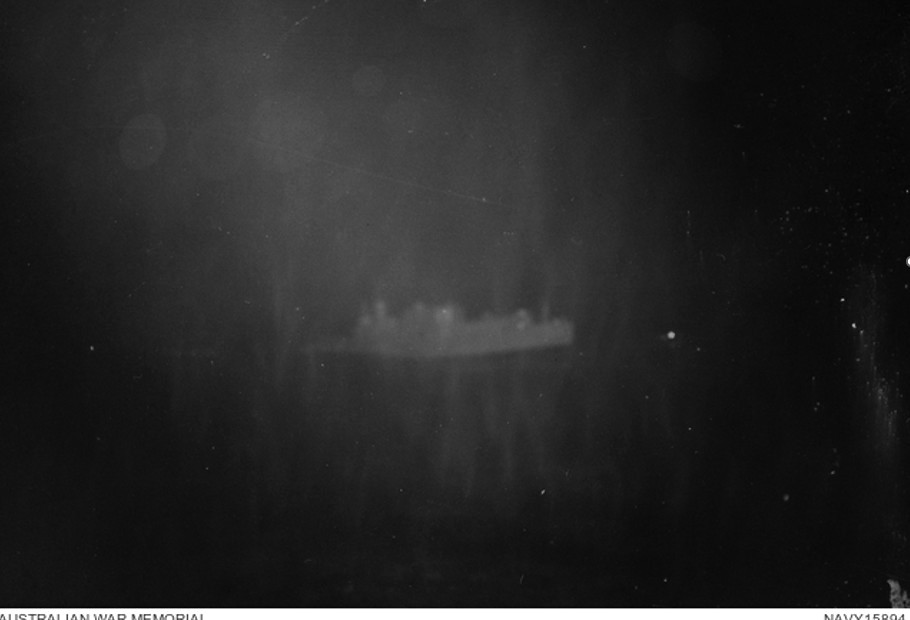
This must have been a very hard signal to send. I remember watching the after half of Voyager’s last moments as her propellors rose to a perpendicular aspect and she slowly sank beneath the surface.
Having not found the Communication log amongst the signals, I had to rethink about further locating information, it was then that the penny dropped. I needed specific identification and I had it all the time, without realising it. The logbook was an exhibit at the first Royal Commission, all I had to do was find that exhibit number and I was home and hosed.
Fortunately, I had a copy of the Transcript of Proceedings for 20 March 1964 which was the day I was called before first Royal Commission. After being sworn in it was confirmed that I was the communications operator on watch on the bridge prior to the accident. I was asked if I sent and received all messages from Melbourne to Voyager and were the messages logged, I confirmed both.
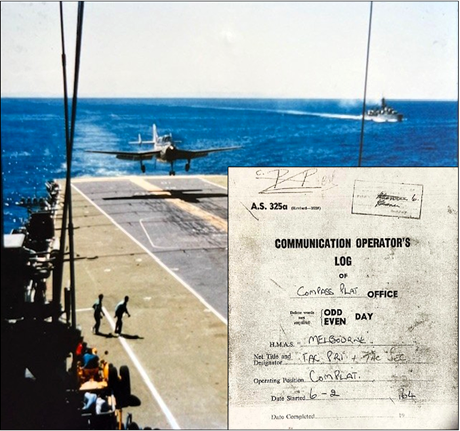
Leading Council Assisting Commission, Mr. J W Smyth QC., then approached me in the witness stand and said “I show you Exhibit 6, where was it in the log that you took over the watch”? He was referring to the Communication Operators Log from Melbourne’s Bridge. I now knew that I was looking for Exhibit 6 from the first Royal Commission. I was then able to go back to the National Archives liaising with Kelly, a very helpful Archival Officer who had vague memories of the incident and after chatting for a little while she said “leave it with me and I will see what I can do”.
About three hours later the phone rang and Kelly said “Rob I think I have it” and gave me her locating details. Naturally I went straight online and there it was, a picture of the log and all its pages to the last transmission to Voyager at 1054 GMT, 10/2/1964 (8:54pm).
Not only that, there was a second document Exhibit 7 accompanying Exhibit 6. This was entitled “Communication Operator’s Logbook, Explanation of Messages from 0820 to 1054 on 10.2.64”. The document contained five pages of all messages sent between those times in signal form and also in decoded plain language form. This document was obviously prepared to assist those who were unfamiliar with naval maneuvering signals.
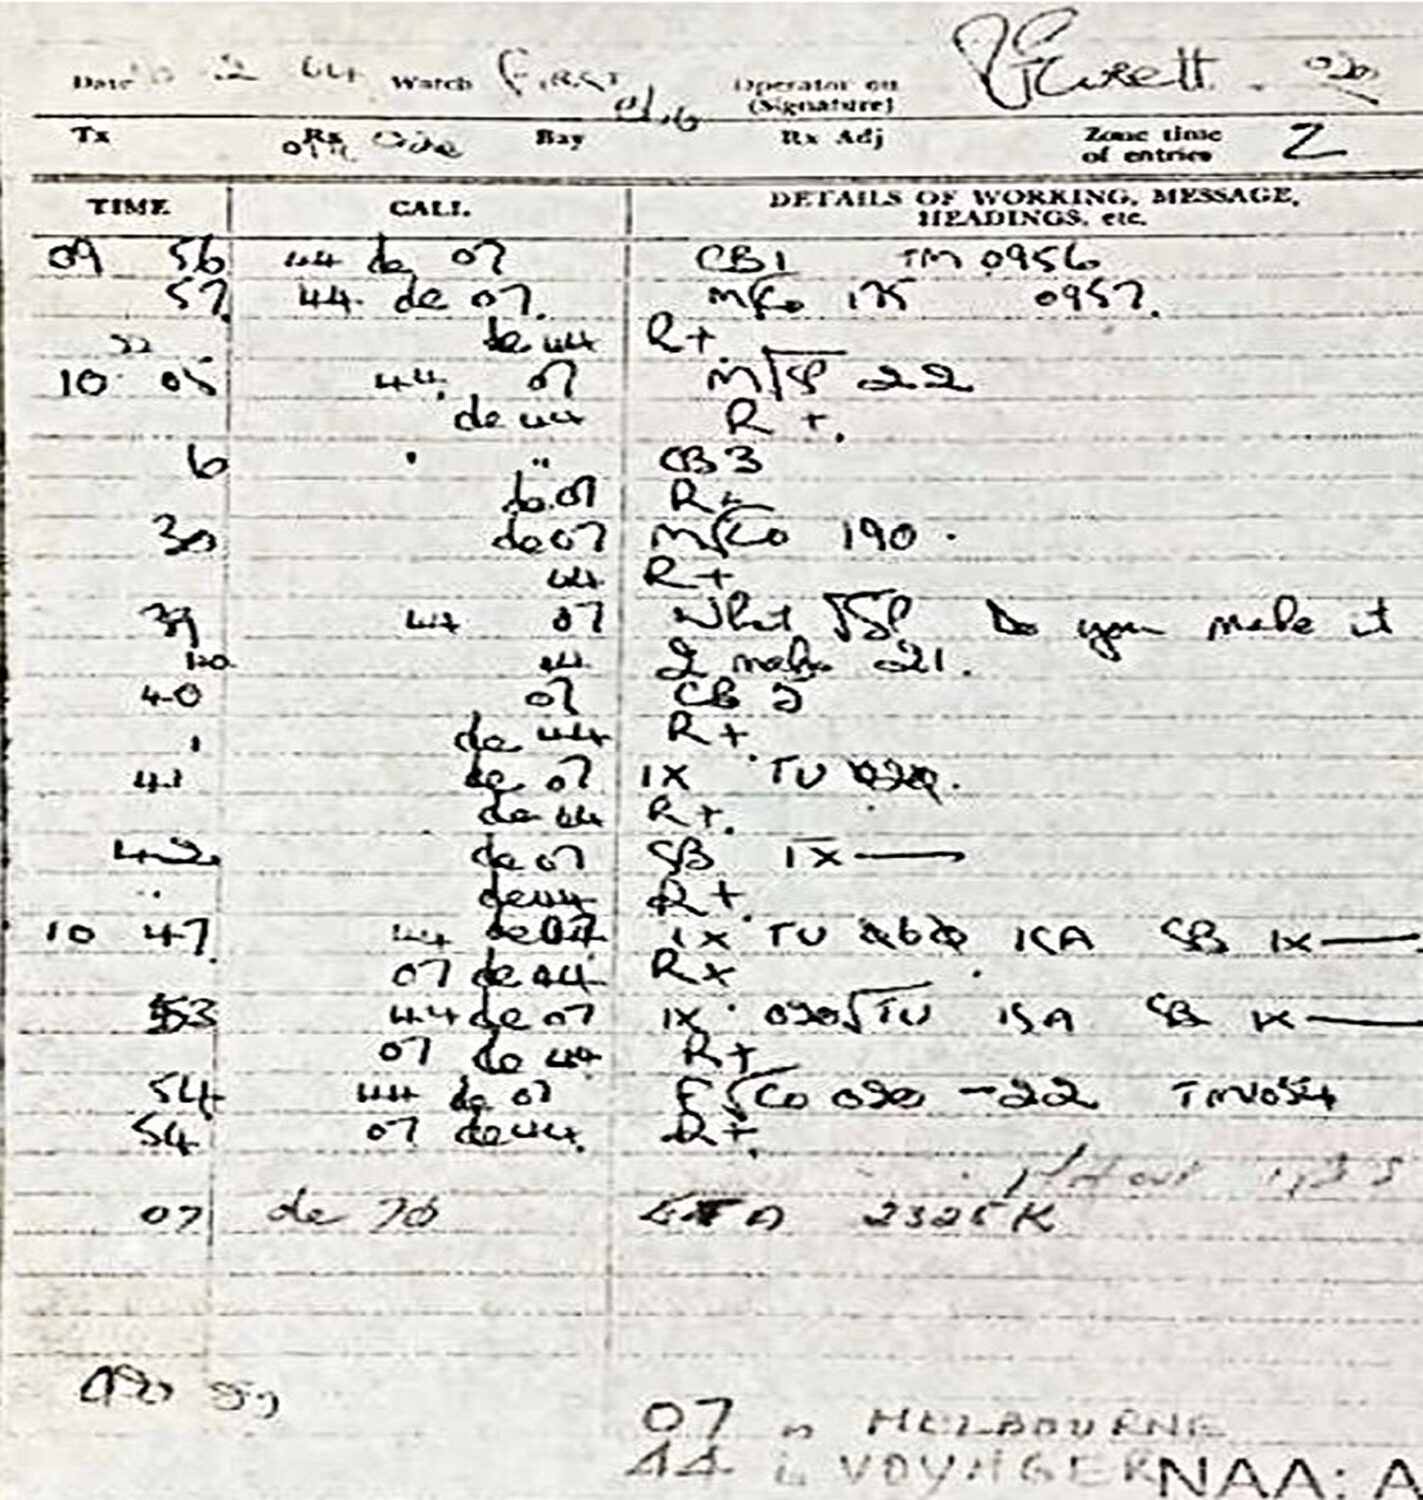
Plain language decoding of the above short-hand messages:
Left column: time.
Centre column: call parties, 44 was Voyager, 07 was Melbourne, ‘de’ means ‘this is’.
Right column content
CB1,2 and 3 relate to flying operations, active or delayed M CO175: Mike Corpen 175—my course is 175 degrees M SP22: my speed is 22 knots
IX TU 020: means execute to follow, turn together to starboard to the course 020
SB IX: means standby to execute, which is carried out on
the word execute.
IX TU 060 ISA SB IX: means immediate execute turn to starboard to the course 060 I say again turn to starboard to the course 060 standby execute (turn on the word execute)
IX 020 TU ISA SB IX: means immediate execute turn to port to the course 020, I say again turn to port to the course 020 standby execute (the turn to port is indicated by the new course being designated before the TU (turn) order.
F CO 020-22: short for Foxtrot Corpen 020 tack 22 which means flying course is 020 speed 22 knots, go to your RESDES (rescue destroyer) station.
R+: means your message is received.
Mission accomplished. All that now remains is for me to visit the National Archives in Canberra and see the original document.